
How to Restore Old Photos: Complete Step-by-Step Guide (2026)
Learn how to restore old photos step by step. From scanning and crease repair to AI colorization and upscaling, compare top tools and practical restoration workflows.
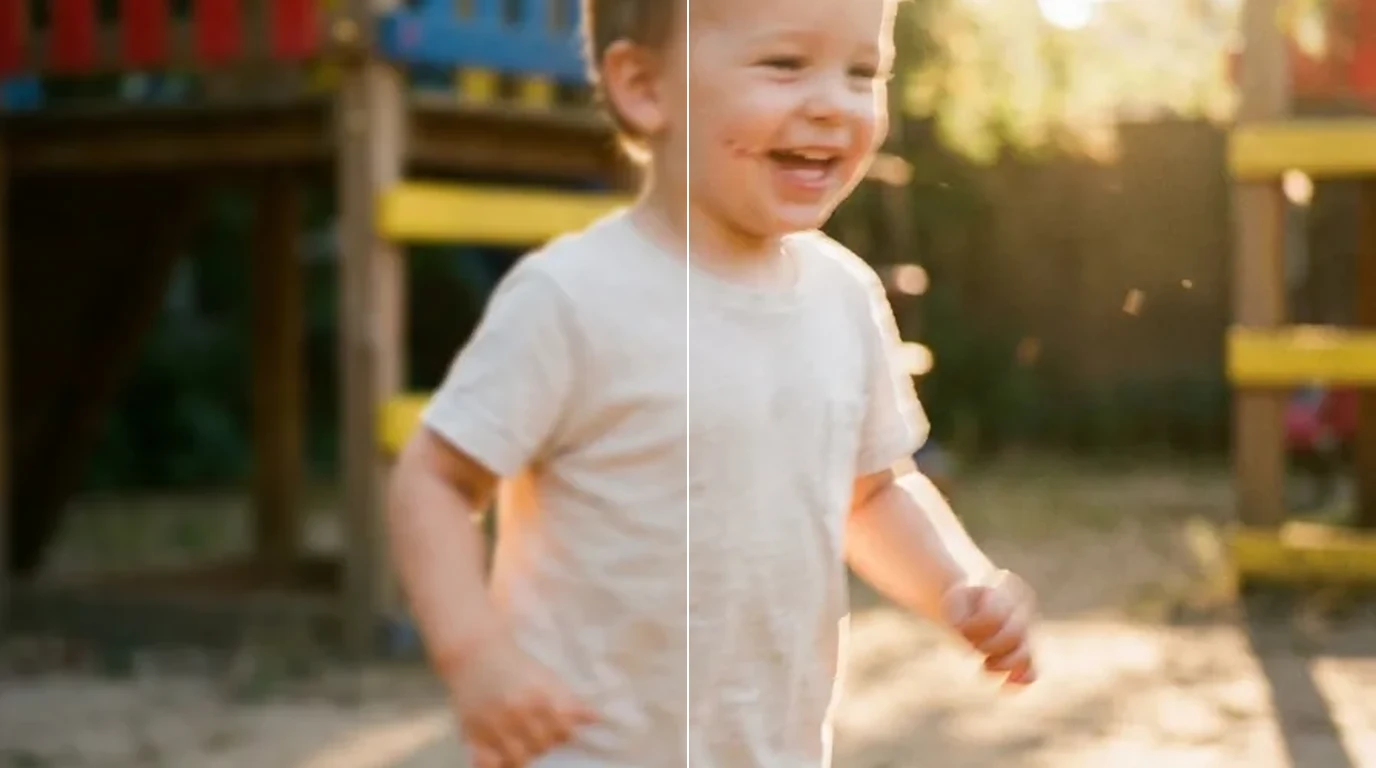
Family prints, heirloom wedding portraits, and vintage snapshots carry irreplaceable memories. Yet physical photographs are delicate objects. Over decades, ultraviolet light breaks down dyes and silver halides. Humidity causes emulsions to adhere to frame glass, acidic album sleeves yellow paper fibers, and repeated handling leaves folding creases, scratches, and torn corners.
Modern restoration methods make reviving damaged family archives accessible to everyone. You no longer need to pay hundreds of dollars per print to specialized conservation studios or spend days mastering clone stamp brushes in desktop suites. By pairing methodical scanning techniques with modern neural image restoration engines, you can eliminate cracks, restore lost facial contours, revitalize contrast, and add realistic color to monochrome heirlooms.
This practical guide walks you through the complete restoration process from physical handling to final archival printing, including key error checks and a verified comparison of top digital restoration tools.
Note: This article is written by the CrispFix team, and CrispFix is included in the workflow and tool comparisons.
Key Takeaways (TL;DR)
- Step 1 (Digitization): Scan prints flat at 600 DPI (1200 DPI for small wallet prints) as uncompressed TIFF or PNG. Never photograph glossy prints under direct overhead bulbs.
- Step 2 (Tool Selection): Match tools to damage type. Neural inpainting repairs cracks in seconds, while physical tears may require manual clone patching.
- Step 3 (Defect Removal): Remove physical creases, scratches, and water spots before running facial sharpening to prevent baking artifacts into your image.
- Step 4 (Color & Contrast): Balance monochrome shadow dynamic range before colorizing. AI colorization requires clean tonal foundations.
- Step 5 (Upscaling & Archiving): Use neural super-resolution to prepare vintage low-resolution files for physical framing and reprint at 300 DPI output dimensions.
- Recommended Free Tool: CrispFix repairs creases, removes glare, colorizes black-and-white scans, and enhances resolution without fees, subscriptions, or watermarks.
Restoration Workflow & Tool Comparison
The table below summarizes verified pricing, primary capabilities, supported platforms, and ideal applications across seven leading restoration tools:
| Tool | Verified Pricing | Primary Restoration Strength | Platform Support | Best For |
|---|---|---|---|---|
| CrispFix | 100% Free (no accounts or watermarks) | Neural scratch repair, glare removal, colorization & upscaling | Web (All browsers) | Fast browser repair of family prints without subscriptions |
| Adobe Photoshop | Photography Plan $19.99/mo or $22.99/mo | Photo Restoration Neural Filter, manual Clone Stamp & Healing | macOS, Windows, iPad | Advanced manual retouching and heavy structural reconstruction |
| Topaz Photo AI | $199/yr billed annually or $39/mo | Deep learning RAW denoise, Face Recovery & 6x scaling | macOS, Windows (Desktop + Plugins) | Studio prints, archive enlargements & pro photography |
| VanceAI Photo Restorer | 3 free credits; from $4.95/mo (100 credits) | Cloud scratch removal, portrait enhancement & colorization | Web, Windows PC | Quick automated cloud batch processing for damaged prints |
| MyHeritage Photo Tools | Free trial (watermarked); subscription required | Specialized ancestral portrait unblurring & colorization | Web, iOS, Android | Genealogy research and family tree portrait restoration |
| Remini | Free ad-tier mobile; Pro ~$9.99/wk | Deep generative facial reconstruction & micro-detail rebuild | iOS, Android, Web | Restoring heavily blurred or soft vintage facial portraits |
| GIMP | 100% Free & Open-Source (GNU GPL v3+) | Manual healing brushes, clone stamp & frequency separation | Linux, macOS, Windows | Privacy-focused manual repair with zero software cost |
(Note: Pricing and features verified against official vendor documentation as of September 2026).
Step 1: Digitize and Archive Your Physical Print
Digital restoration begins with a clean digital capture. If you start with a low-resolution phone snapshot taken under uneven room lighting, digital filters will struggle with reflections, shadows, and lens distortion.
1. The Flatbed Scanner Method (Recommended)
A dedicated flatbed scanner remains the gold standard for digitizing fragile prints:
- Clean the Glass Platen: Wipe the scanner bed with a lint-free microfiber cloth lightly misted with optical glass cleaner. Never spray liquid directly onto the glass.
- Set the Resolution: Scan standard 4x6 or 5x7 inch prints at 600 DPI (dots per inch). For small passport photos or locket pictures, scan at 1200 DPI. Scanning higher than 1200 DPI on reflective paper prints merely records paper fibers rather than additional image data.
- Color Depth and Format: Scan in 24-bit color, even for monochrome black-and-white photos. Faded monochrome prints contain subtle sepia shifts and warm stains that color channels capture for targeted digital isolation. Save your master files as uncompressed TIFF or 24-bit PNG.
2. The Smartphone Capture Method (Alternative)
If you lack a flatbed scanner, digitize prints using a modern smartphone camera:
- Place the print on a flat, matte gray surface near indirect natural light, such as a large window. Never place photographs under direct sunlight.
- Hold the phone parallel to the print to avoid perspective distortion, using the camera grid overlay to align borders.
- Disable on-camera flash, which creates severe hot spots on glossy photographic emulsions.
Common Mistakes to Avoid in Step 1
- Forcing stuck photos from album sleeves: If an old print has fused to magnetic album plastic or frame glass, do not peel it off. Scan through the protective cover rather than tearing the emulsion.
- Saving lossy JPEGs during capture: Never save initial scans as compressed JPEGs. Compression introduces blocky artifacts that neural repair tools mistakenly treat as genuine texture.
Quality Benchmark for Step 1
Your raw digital scan should show sharp focus across all four corners, neutral borders, zero flash glare reflections, and a file resolution of at least 2400x3000 pixels for a standard print.
Step 2: Assess Damage and Select Your Tool
Before editing, inspect your digital capture at 100% zoom and classify the damage into three primary categories:
- Surface Defects (Cracks, Scratches, and Dust): Physical abrasions caused by handling, folding creases across faces, insect spotting, and mildew spots.
- Chemical Fading and Tone Shifts: Oxidation of the silver image layer, turning dark blacks into pale yellow-brown tones, alongside loss of shadow definition.
- Loss of Fine Geometric Detail: Out-of-focus optics from primitive box cameras, motion blur from slow vintage shutter speeds, and missing facial features from flaking emulsion.
Choosing the Right Tool for the Job
- For Fast, Zero-Cost Browser Repair: If your family photos suffer from creases, yellowing, and optical glare, using an online utility like CrispFix lets you upload scans and receive repaired files immediately. Because it requires no software setup and applies dedicated neural inpainting, you avoid hours of manual cloning.
- For Deep Manual Reconstruction: If a physical corner of the photograph is torn away entirely or a crack runs across facial features, desktop software like Adobe Photoshop or GIMP provides brush-level control to rebuild lost structural boundaries before running AI filters.
- For Blurry Facial Portraits: If the original photograph is soft or out of focus, neural tools like Remini or Topaz Photo AI rebuild recognizable eyes, lips, and hair strands from generative anatomical models.
Step 3: Repair Cracks, Creases, and Surface Scratches
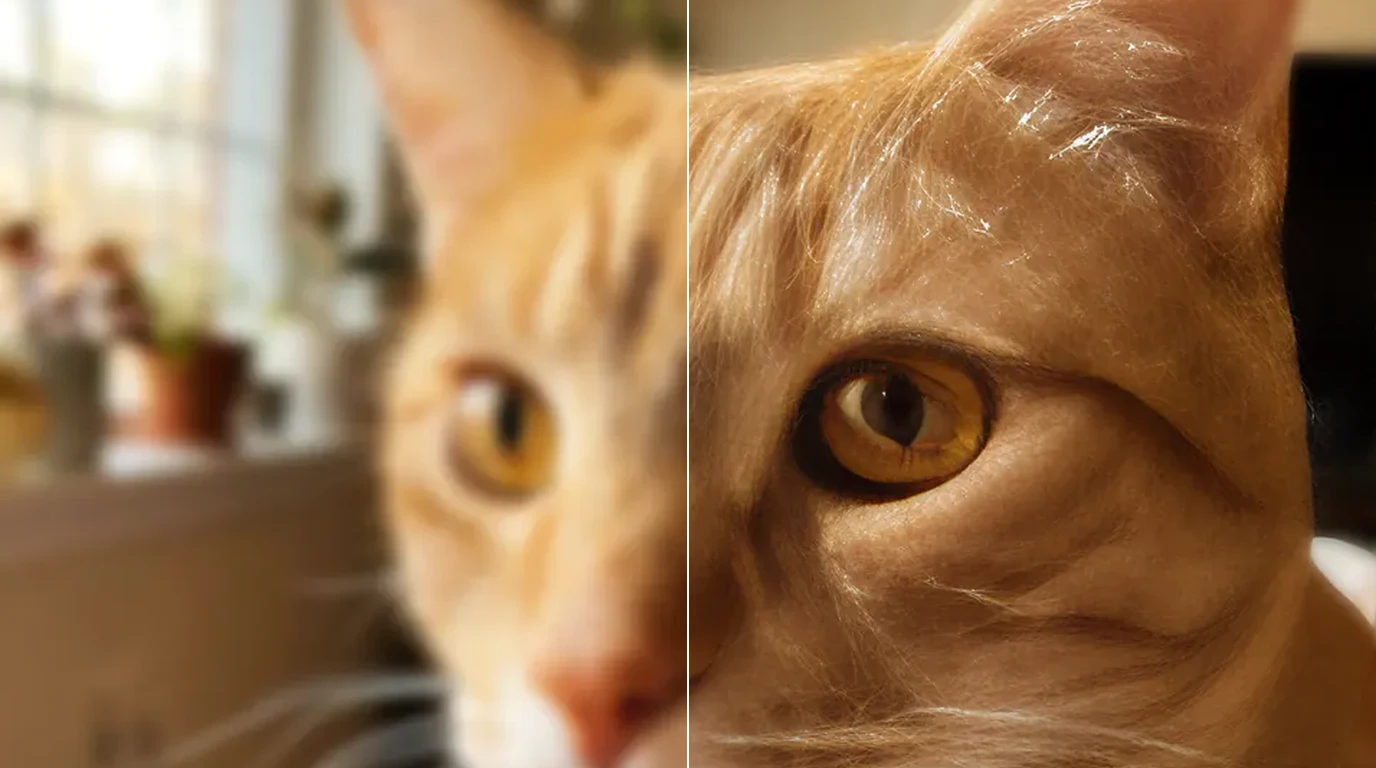
Physical surface damage should always be your first repair target. If you attempt to upscale or colorize a photograph before removing cracks, algorithms will interpret white fracture lines as high-contrast structural borders, creating unnatural halos.
1. Neural Inpainting (Automated Method)
Modern inpainting models analyze patterns surrounding a damaged zone and generate mathematically consistent fill textures.
- Upload your clean scan to an automated restorer such as the old photo restoration tool on CrispFix.
- The neural network detects high-contrast fracture lines, hairline scratches, and dust spots, replacing them with coherent skin texture, clothing fabric, or background grain.
- If your scan contains bright flash reflections or glare from spectacles, running an eyeglasses glare removal pass eliminates distracting white reflections without altering underlying eye geometry.
2. Manual Spot Healing and Clone Stamping (Precision Method)
For historic prints with missing paper fragments or intricate embroidery that automated models might blur:
- Open the file in Photoshop or GIMP and create a new blank layer named
Retouching. - Set your Spot Healing Brush or Healing Tool to sample
All Layers. Keep the brush diameter slightly larger than the scratch width, dabbing individual spots rather than dragging long strokes. - Near critical anatomical landmarks (eyelids, nostrils, lip contours), switch to the Clone Stamp Tool with 70% opacity and soft edges. Sample skin texture from an equidistant, evenly lit part of the cheek to paint over tears.
Common Mistakes to Avoid in Step 3
- Over-smoothing paper grain: Vintage fiber-based photo paper has an authentic organic texture. Aggressive noise reduction strips this grain away, leaving faces looking like smooth plastic mannequins. Keep authentic photographic grain intact.
- Cloning across directional lighting: Never sample skin from the shadow side of a face to patch a scratch on the highlight side. The mismatched light angle creates distracting smudges.
Quality Benchmark for Step 3
At 100% magnification, all white fracture lines and dark mold specks should be imperceptible, while the underlying grain structure remains continuous and natural.
Step 4: Revitalize Contrast and Apply Natural Colorization
Once surface cracks are gone, you can address tonal fading. Silver gelatin and albumen prints naturally oxidize over time, compressing dynamic range and turning rich dark values into murky gray-browns.
1. Rebuilding Tonal Range (Contrast Normalization)
Before introducing any color, restore proper tonal values:
- Open your image levels or curves histogram. Faded vintage prints typically show empty gaps at both ends of the histogram, indicating no true black and no clean white.
- Drag the black-point slider inward until it touches the start of the shadow data curve, and drag the white-point slider inward toward the highlight boundary.
- If deep shadows remain muddy, lift midtones slightly to recover eyes, fabric folds, and background architectural details.
2. Applying Neural Colorization
Adding natural color brings historic figures to life, transforming distant historical subjects into relatable human moments.
- Upload the contrast-adjusted monochrome file to an automated engine like the CrispFix colorize photo tool.
- Neural colorizers examine contextual clues (identifying skin, sky, foliage, wool uniforms, and brickwork) and assign realistic color palettes learned from millions of historical reference photographs.
- For family genealogy projects, cross-reference historical uniforms or eye colors when possible. Many tools let you adjust color saturation sliders if the automated guess appears too warm or too vibrant.
Common Mistakes to Avoid in Step 4
- Oversaturating vintage scenes: Early 20th-century fabrics, dyes, and paints were muted compared to modern synthetic clothing. Bright neon greens or vivid turquoise blues make an old photo look artificial. Aim for subtle, understated earth tones.
- Color bleed across boundaries: Check fingers, collar edges, and hair contours. In inferior models, skin color frequently bleeds onto white shirt collars. If bleeding occurs, lower saturation or mask the collar back to neutral white.
Quality Benchmark for Step 4
Skin tones should exhibit warm, natural gradations without uniform orange staining. Background elements should possess distinct, realistic hues with clean boundaries.
Step 5: Upscale Resolution and Prepare for Archival Printing
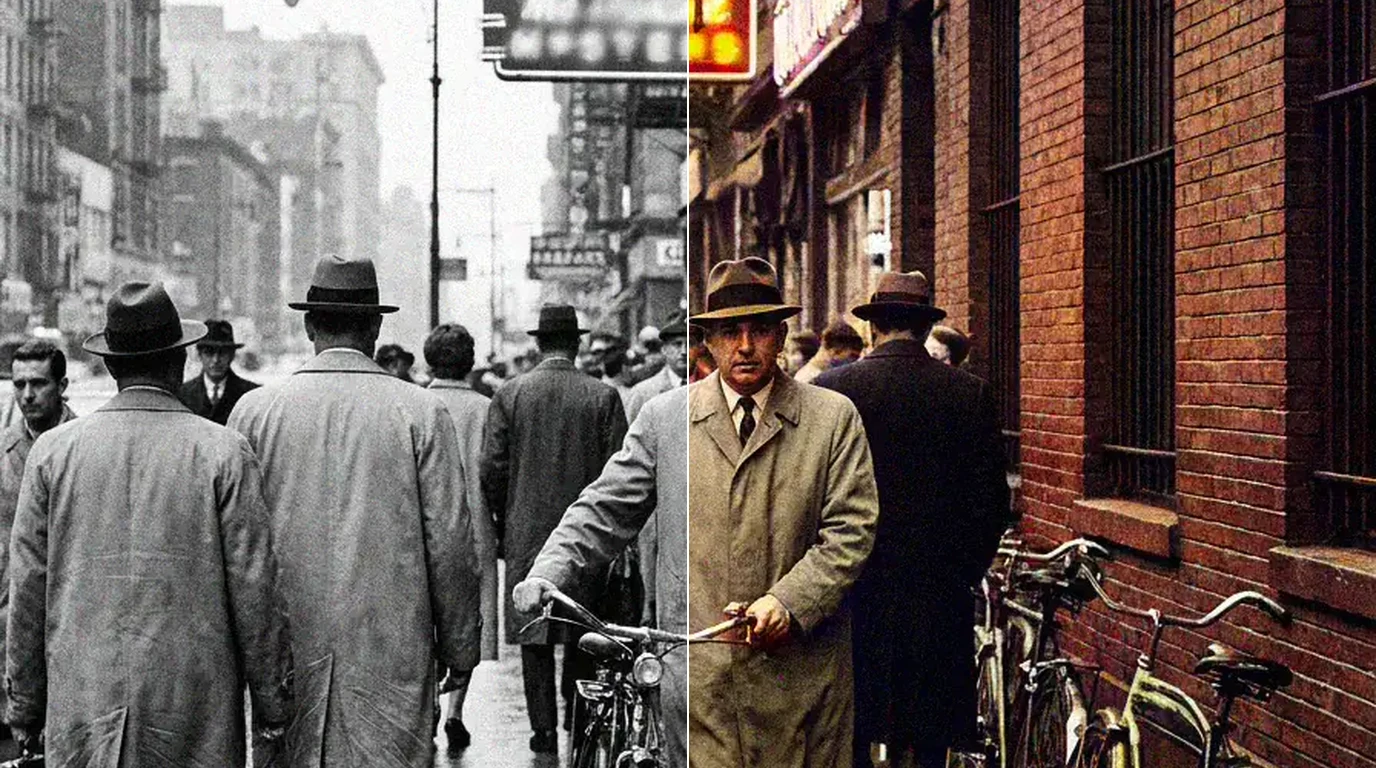
Many restored family photographs measure only 2x3 or 3x5 inches originally. If you want to frame an 8x10 or 11x14 inch print for a family reunion, simply enlarging the image in a basic photo viewer will create blurry, pixelated results.
1. Neural Super-Resolution Upscaling
Traditional bicubic interpolation duplicates existing pixels, resulting in blurry edges. In contrast, neural super-resolution models reconstruct missing microscopic textures based on learned photographic priors.
- Process your restored image through a dedicated resolution image enhancer.
- Select a 2x or 4x magnification multiplier. A 4x scale transforms a modest 1200x1800 pixel vintage snapshot into a razor-sharp 4800x7200 pixel master file suitable for commercial poster printing.
- For additional technical comparisons on upscaling engines, see our in-depth evaluation of the best AI enhancers.
2. Output Sizing and Print Settings
To ensure your restored digital file looks stunning when held in physical hands:
- Set Output Resolution to 300 DPI: Photographic print labs require 300 pixels per inch for crisp physical output. A 4800x7200 file at 300 DPI yields a clean 16x24 inch print.
- Select Acid-Free Archival Paper: Print on 100% cotton rag or heavy archival luster paper using pigment-based inks. Pigment prints resist fading for over 100 years when kept behind UV-filtering framing glass.
Common Mistakes to Avoid in Step 5
- Excessive sharpening: Avoid applying harsh unsharp masking on upscaled images. Over-sharpening introduces white halo outlines along high-contrast edges and accentuates residual scanner dust.
- Printing on cheap standard photo paper: Non-archival wood-pulp papers contain lignin, which turns yellow and brittle within a decade.
Quality Benchmark for Step 5
When viewed at 100% on a calibrated monitor, eyes, eyelashes, and fabric weaves appear sharp and distinct, with zero jagged pixel stepping or edge ringing.
Recommended Tools for Restoring Old Photos
To help you decide which tool fits your specific workflow, here is a breakdown of top options:
1. CrispFix: Best Free All-in-One Browser Suite
For home archivists who want high-quality restoration without subscriptions, software installation, or watermarks, CrispFix provides an integrated browser suite. You can upload damaged scans to repair scratches, remove glare from eyeglasses, apply neural colorization, and upscale final files to 4K print resolution.
- Strengths: Completely free with zero accounts, no watermarks, and unmetered browser processing; fast turnaround for scratch removal and colorization.
- Limitations: Focuses on automated neural tasks; does not include multi-layer manual cloning brushes.
- Pricing: 100% free with direct full-resolution downloads.
- Platform: Web (All desktop and mobile browsers).
- Official Source: https://crispfix.com
2. Adobe Photoshop: Best for Professional Studio Conservation
Photoshop remains the benchmark tool for professional digital conservators. Its Photo Restoration Neural Filter automates scratch suppression and facial clean-up, while its extensive layer system, clone stamp, and patch tools give professionals complete control over every pixel.
- Strengths: Industry-standard layer masking and cloning control; combined neural filters with precision manual tools.
- Limitations: High monthly subscription fee; steep learning curve for casual users.
- Pricing: Photography Plan at $19.99/month; Photoshop Single App at $22.99/month.
- Platform: macOS, Windows, iPad.
- Official Source: https://www.adobe.com/products/photoshop.html
3. Topaz Photo AI: Best for Gallery Enlargements
If your priority is extracting the sharpest possible output from vintage family negatives or medium-format prints, Topaz Photo AI provides exceptional desktop rendering. Its Face Recovery engine rebuilds facial geometry with convincing realism, while its 6x upscaler produces gallery-grade files.
- Strengths: Standalone desktop offline processing; unmatched face reconstruction on soft prints; up to 6x enlargement.
- Limitations: Requires a capable dedicated graphics card; premium pricing model.
- Pricing: $199/year (annual plan) or $39/month.
- Platform: macOS and Windows desktop.
- Official Source: https://www.topazlabs.com/topaz-photo-ai
4. VanceAI Photo Restorer: Best for Automated Cloud Batches
VanceAI offers a dedicated online photo restorer that combines crease removal, sharpening, and colorization into an automated cloud pipeline. It is well suited for users with dozens of old photos who prefer automated batch processing.
- Strengths: Simple one-click web interface; cloud-based processing requires no local GPU power.
- Limitations: Free trial limited to 3 credits; recurring subscription required for ongoing batches.
- Pricing: 3 trial credits; subscription plans start at $4.95/month for 100 credits.
- Platform: Web and Windows PC.
- Official Source: https://vanceai.com/old-photo-restoration/
FAQ
Can AI completely restore a ripped or torn photograph?
AI restoration tools excel at filling thin cracks, hairline scratches, and small surface voids by analyzing surrounding pixel textures through neural inpainting. However, if a large physical chunk of the photograph is missing—such as an entire face or half the background—the AI must fabricate content from scratch, which can produce historically inaccurate results. For severe tears, combine manual patching in software like GIMP or Photoshop to reconstruct major outlines before running automated inpainting.
Should I colorize my black-and-white family photos?
Colorization is a personal choice that depends on how you plan to use the image. Black-and-white prints hold authentic historical charm, and many archivists prefer preserving them in their original monochrome form. However, applying high-quality AI colorization can make century-old ancestors feel immediate and relatable to younger family members. The best practice is to always save and archive your cleaned black-and-white scan first before creating a colorized derivative copy.
What scanner resolution is best for old photographs?
For standard reflective prints measuring 4x6 inches or larger, 600 DPI is the ideal scanning resolution. It captures all the optical detail preserved in the paper emulsion without bloating file sizes. For tiny passport pictures, locket photos, or cabinet card portraits that you plan to enlarge, scan at 1200 DPI. Scanning reflective paper prints at 2400 DPI or higher does not reveal extra image detail; it simply magnifies the physical fiber texture of the paper.
Will restoring an old photo damage the original print?
Digital restoration is completely non-destructive because all editing takes place on a digitized scan. The physical heirloom remains completely untouched. To protect original prints, handle them by their edges wearing clean cotton gloves, store them in acid-free archival sleeves, and keep them away from direct sunlight, high heat, and damp basements.